Overview
When all the system NICs appear in Down or Unknown status, the Exinda installation may become corrupted.
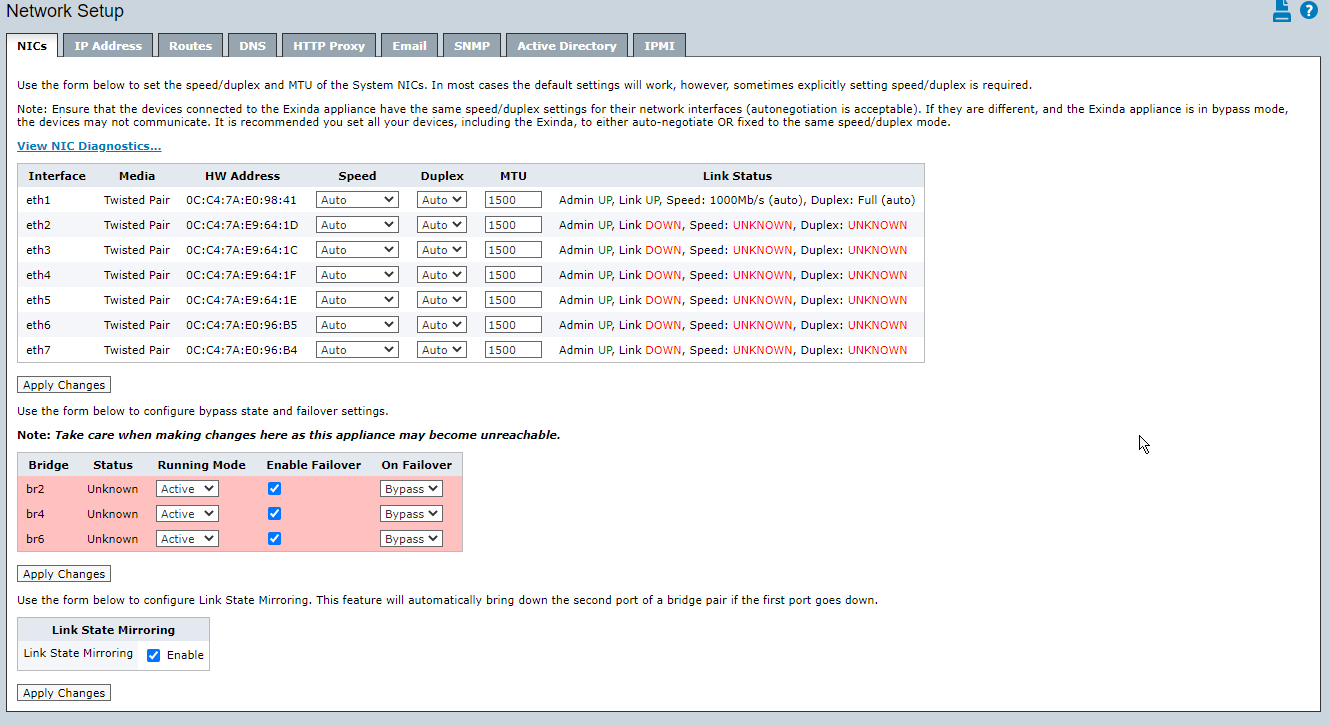
If there are no bridges' LED indicators and the appliance was rebooted multiple times, as a last resort Exinda can be reimaged.
This article contains the steps to remanufacture an Exinda appliance.
Note: This process will cause a loss of data/configuration information.
Before you begin, you will need
- Physical access to the Exinda appliance to be re-imaged
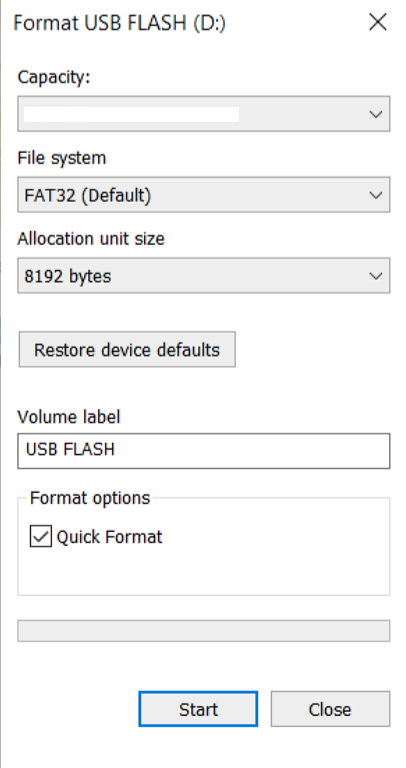
- A USB flash drive no larger than 4GB formatted using the FAT32 file system
- VGA/Console control over the Exinda appliance OR a keyboard and monitor, depending on the Exinda model
Solution
- Download the appropriate file based on your Exinda version
Note: If you click on a download link below and the download link does not begin automatically, right-click on the link and select Copy Link Address. Then open a new browser tab, paste the link into the address line, and press Enter.
- 7.5.5 https://updates.exinda.com/exos/factory_images/exinda-v7.5.5-0042-x86_64.zip
- 7.5.4 https://updates.exinda.com/exos/factory_images/exinda-v7.5.4-0023-x86_64.zip
- 7.5.3 https://updates.exinda.com/exos/factory_images/exinda-v7.5.3-0012-x86_64.zip
- 7.5.2 https://updates.exinda.com/exos/factory_images/exinda-v7.5.2-0038-x86_64.zip
- 7.5.1 https://updates.exinda.com/exos/factory_images/exinda-v7.5.1-0069-x86_64.zip
- 7.5.0 https://updates.exinda.com/exos/factory_images/exinda-v7.5.0-0022-x86_64.zip
- 7.4.13 https://updates.exinda.com/exos/factory_images/exinda-v7.4.13-0110-x86_64.zip
- 7.4.12 https://updates.exinda.com/exos/factory_images/exinda-v7.4.12-0063-x86_64.zip
- 7.4.11 https://updates.exinda.com/exos/factory_images/exinda-v7.4.11-0142-x86_64.zip
- Make the USB flash drive bootable:
- Extract the downloaded file to the flash drive
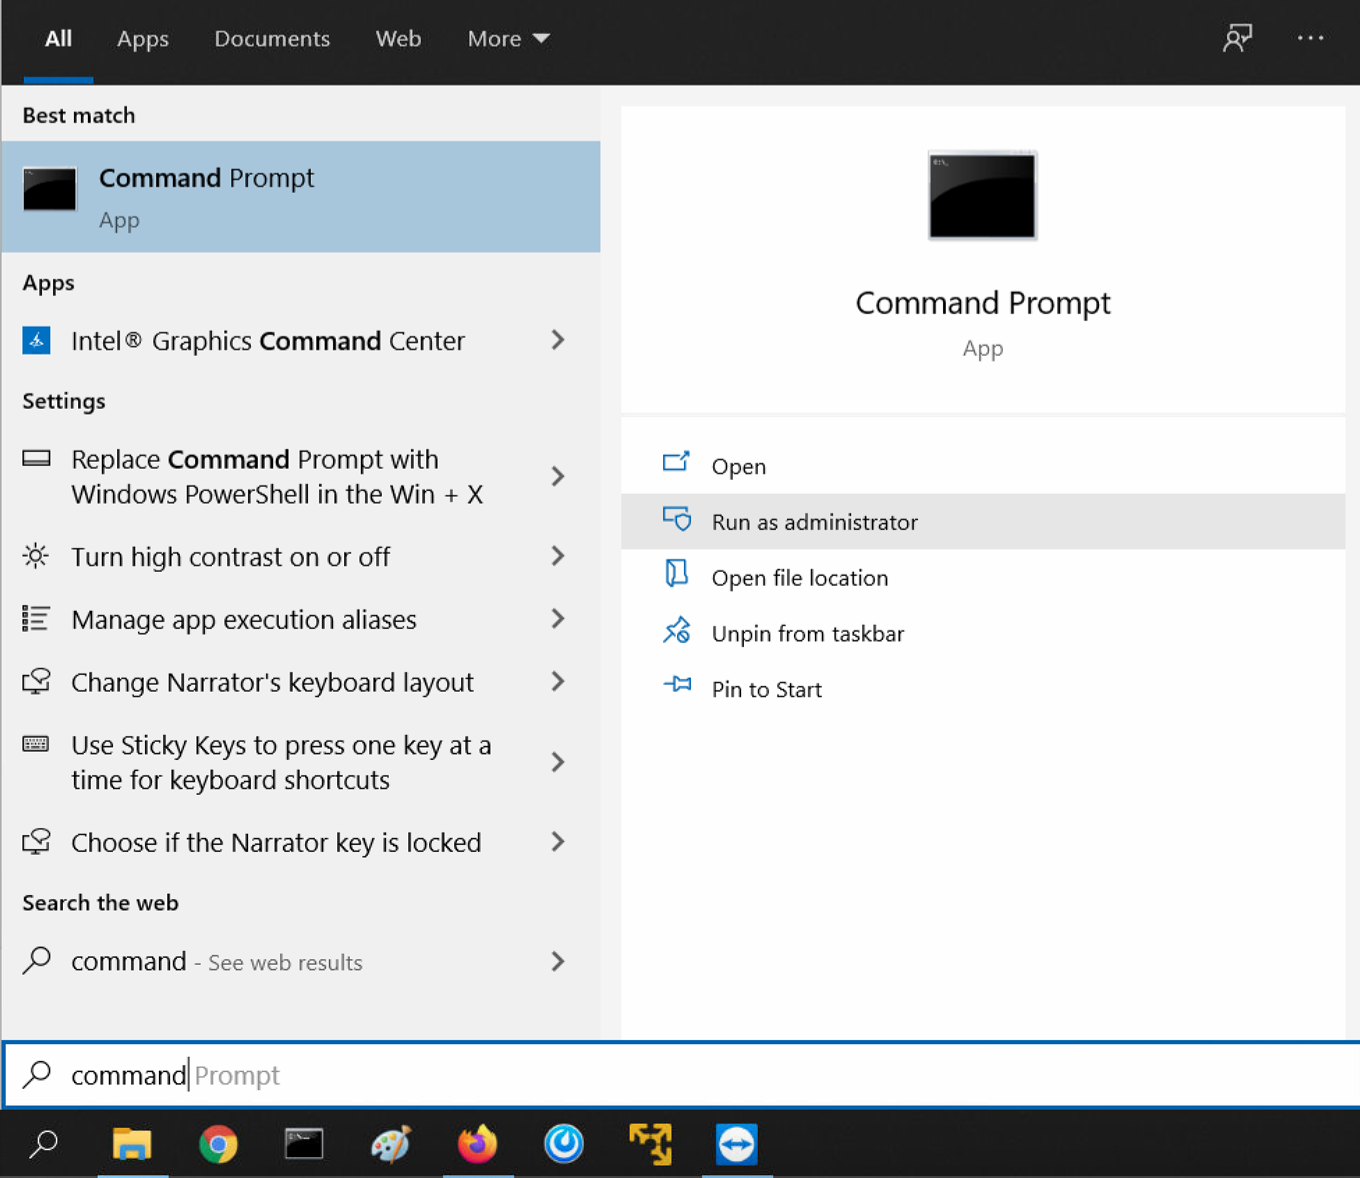
- Open a command prompt as administrator (Windows: Start -> search Command Prompt -> select Run as administrator)
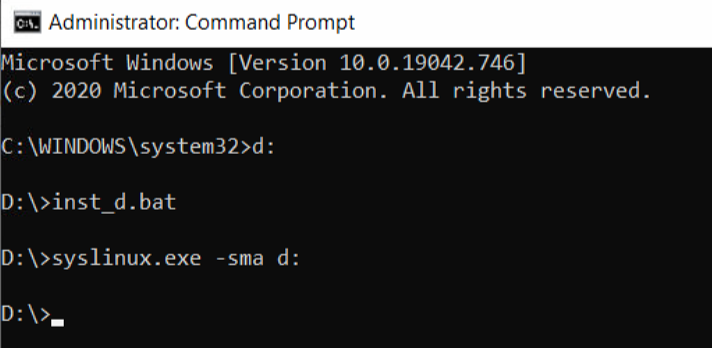
- Type x: in the command prompt (where x: represents the drive letter assigned to the USB flash drive)
- Run the batch file by typing: inst_x.bat (where x: represents the drive letter assigned to the USB flash drive)
- Alternatively, instead of running the batch file above: Type syslinux.exe -sma x: (where x: represents the drive letter assigned to the USB flash drive)
- Use the USB flash drive to boot the Exinda appliance:
- Power off the Exinda appliance.
- Plug the USB flash drive into any available USB port on the Exinda appliance, then turn the appliance back on.
- During the appliance's POST press F11 on Dell-based Exinda. For Unicom devices, 3062 and 4062, they will automatically boot from the USB.
- Select the USB flash drive from the boot device menu by using the arrow keys on the keyboard, then hit the enter key. The appliance will then begin the re-image process which will take some time.
- When you see the message: "Machine restart", unplug the USB flash drive as that is the last phase of the re-imaging process and the appliance is about to reboot.
- Once the Exinda has rebooted, it will now have been back to factory defaults and can be accessed using the default username and password via console.
- The management interface can now be reconfigured and then re-importing the configuration into the device.
Priyanka Bhotika
Comments